How to Automate Customer Statement Emails in NetSuite Using Scheduled Workflows
Most finance teams still send customer statements manually — downloading PDFs, attaching them to emails, sending one by one. NetSuite's scheduled workflows can eliminate that entirely. Here's the exact setup, step by step.
"A small workflow can eliminate hours of manual statement work every single month — no scripting required."
Manual statement sending doesn't scale
In many organisations, sending customer statements is still a manual process. The finance team downloads PDFs, attaches them to individual emails, and sends them customer by customer. For a small customer base this is manageable — beyond that, it becomes time-consuming, inconsistent, and error-prone.
The consequences are predictable: statements go out late, some customers get missed, and the AR team spends time on a task that should have been automated long ago.
Create a saved search to control who gets statements
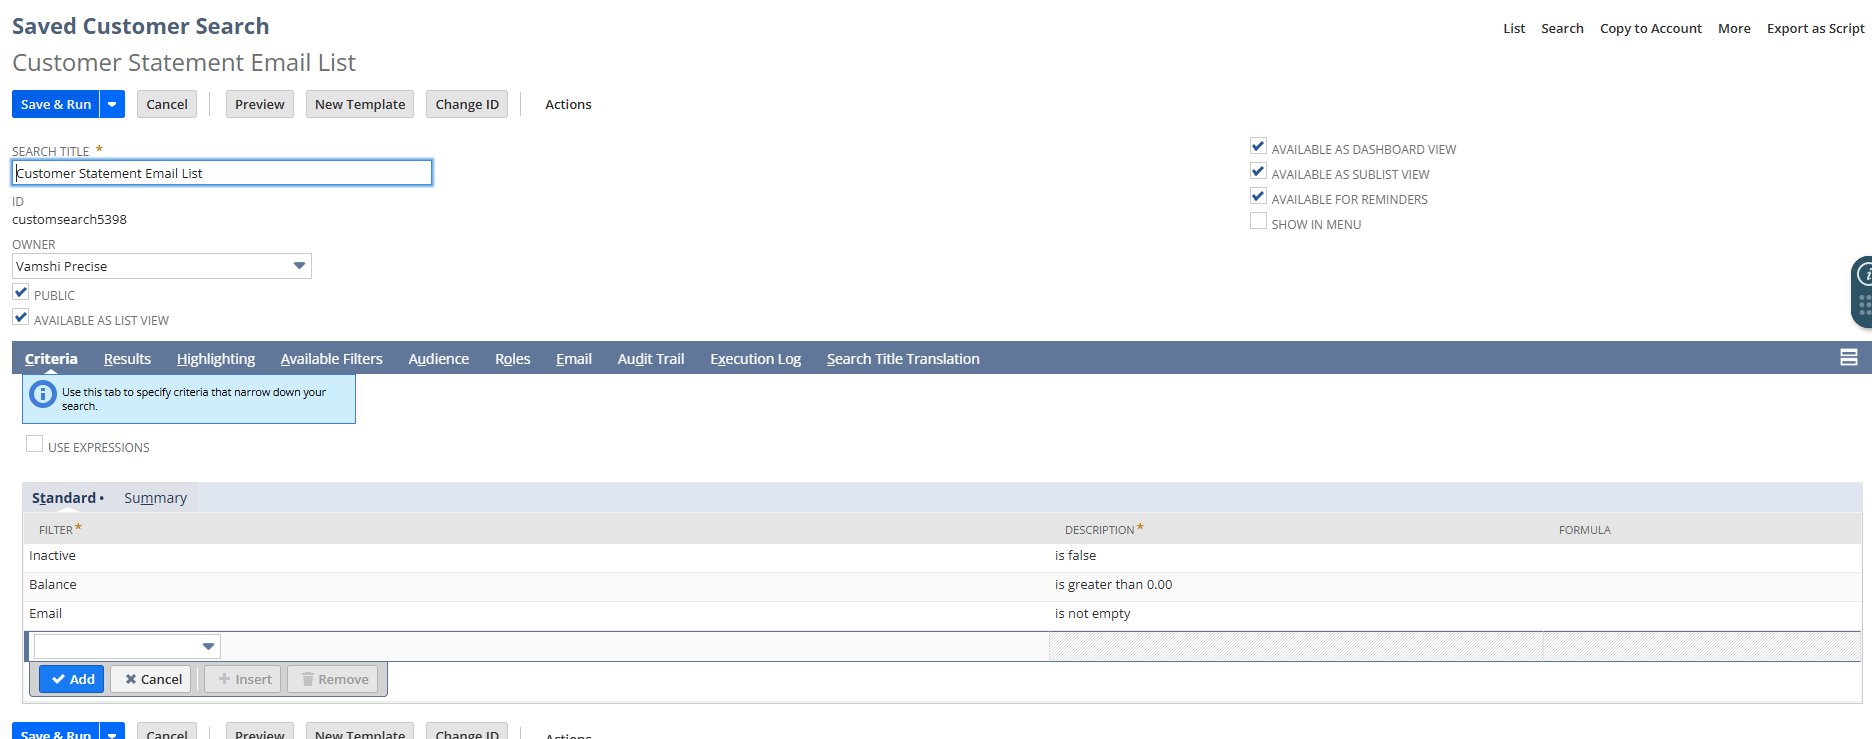
Before building the workflow, create a Customer Saved Search that filters exactly which customers should receive a statement. Navigate to Reports → Saved Searches → All Saved Searches → New → Customer.
Name the search Customer Statement Email List and add the following criteria on the Criteria tab:
| Filter | Condition | Why |
|---|---|---|
| Inactive | is false | Exclude inactive customers |
| Balance | is greater than 0.00 | Only customers with an outstanding balance |
| is not empty | Only customers with a valid email address |
Create the workflow
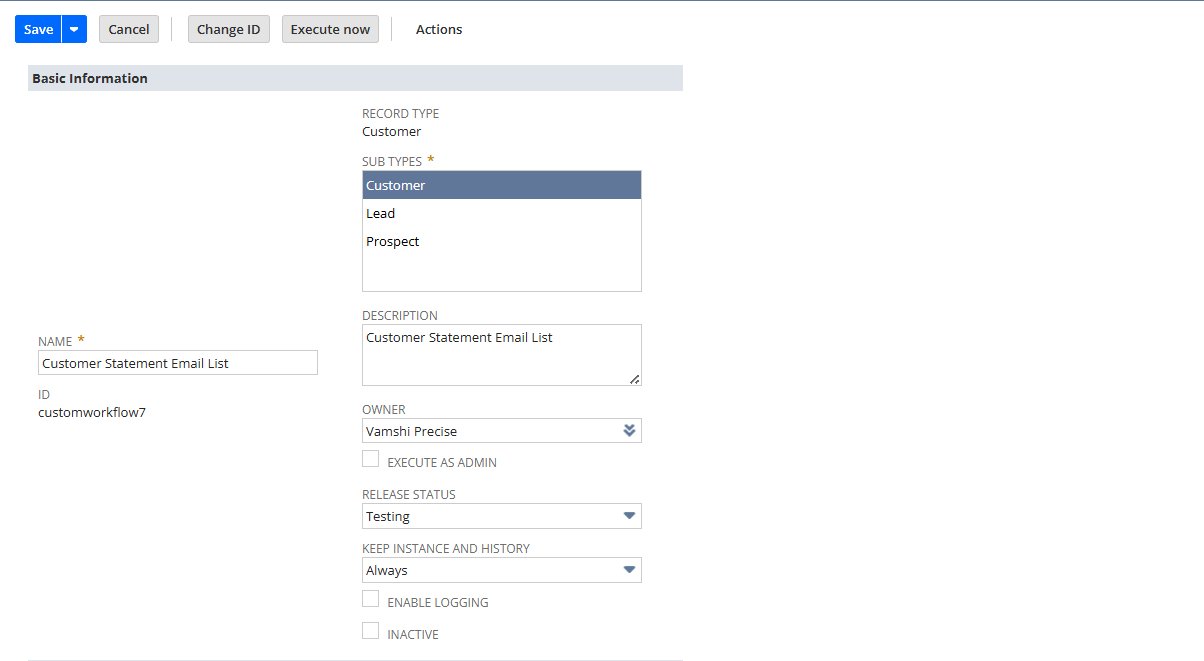
Navigate to Customization → Workflow → Workflows → New and configure Basic Information as follows:
| Field | Value |
|---|---|
| Name | Customer Statement Email List |
| Record Type | Customer |
| Sub Types | Customer only — not Lead or Prospect |
| Release Status | Testing (switch to Released when ready) |
| Keep Instance and History | Always |
Configure the schedule
Set Initiation to Scheduled. The schedule section will appear — configure as follows:
| Field | Value |
|---|---|
| Saved Search Filter | Customer Statement Email List |
| Repeat | Checked |
| Frequency | Monthly |
| Monthly Schedule | Day 1 of every 1 month(s) |
| Execution Time | 12:00 am |

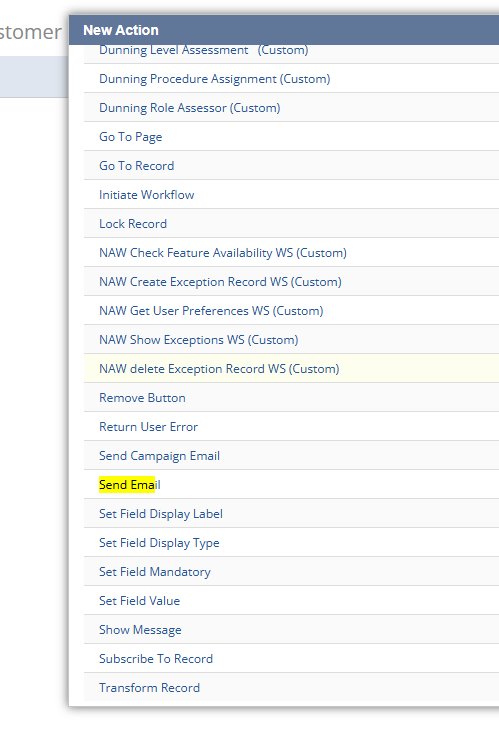
Add the Send Email action
Inside the workflow canvas, create a state named Send Statement Email. Add a new action — from the list that appears, select Send Email.
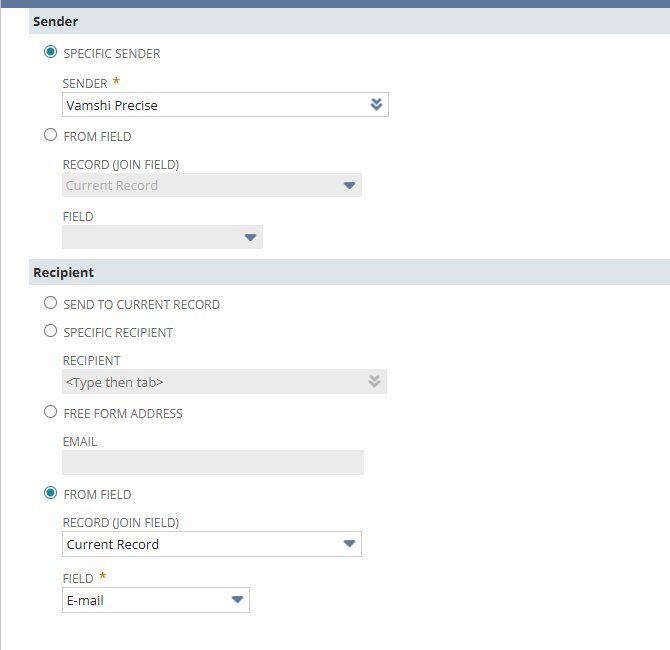
Configure the Sender and Recipient sections:
| Section | Field | Value |
|---|---|---|
| Sender | Sender type | Specific Sender |
| Sender | Sender | Your AR team employee |
| Recipient | Recipient type | From Field |
| Recipient | Record (Join Field) | Current Record |
| Recipient | Field |
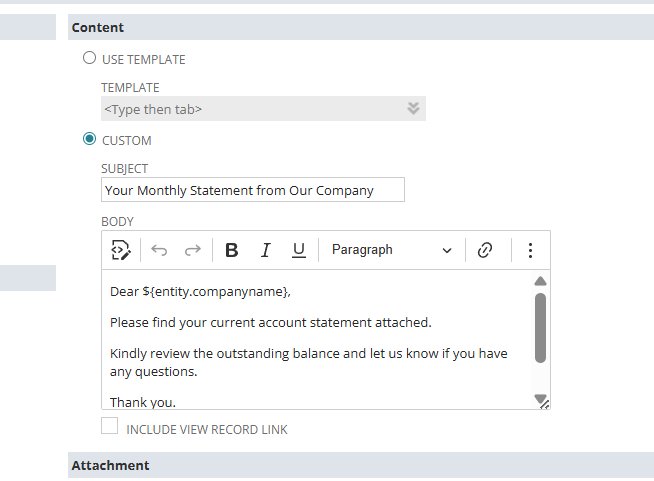
Configure the email content
In the Content section, select Use Template for a reusable setup, or Custom for a quick start. For custom content:
| Field | Value |
|---|---|
| Subject | Your Monthly Statement from Our Company |
| Body | Dear ${'{entity.companyname}'}, please find your current account statement attached. Kindly review the outstanding balance and let us know if you have any questions. Thank you. |
Attach the customer statement PDF
In the Attachment section, check Include Statement and configure the options:
| Field | Value |
|---|---|
| Type | |
| Statement Date / Start Date | Leave blank — defaults to today |
| Show Only Open Transactions | Checked |
| Consolidated Statement | Checked |
| Use Customer's Locale | Optional |
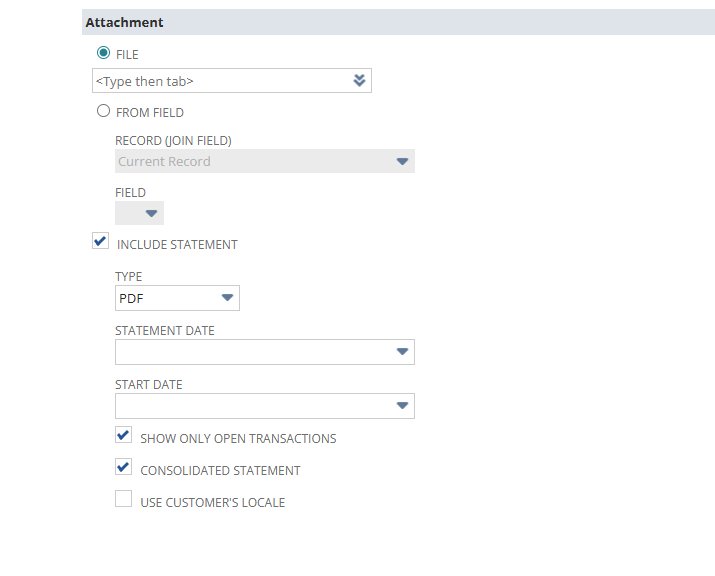
NetSuite generates the statement PDF dynamically at send time. No manual pre-generation needed. If a custom Advanced PDF/HTML template is configured on the customer form, NetSuite uses it automatically.
Test before releasing
With Release Status set to Testing, use the Execute Now button to run against your saved search immediately — without waiting for the scheduled time.
Once satisfied, switch Release Status to Released. The workflow runs automatically on the next scheduled date.
Where to take this next
No scripting needed — just workflow configuration
Scheduled workflows in NetSuite are underused for AR automation. Most teams reach for SuiteScript when the workflow engine handles this kind of task cleanly — without a single line of code.
A well-configured saved search, a scheduled workflow, and a Send Email action with Include Statement checked is all it takes to eliminate manual statement sending entirely.